A viennoiserie or dessert made with puff pastry is one of the most delicious things on the planet. It’s ethereal, light, buttery, and crunchy. Yes, the flaky layers get all over your clothes and the table, but that is part of the experience. Besides, who hasn’t poked their fingers on the crumbs and shards and ate those as well?!
Creating puff pastry from scratch is a labor-intensive and technically demanding undertaking. While there are excellent store-bought alternatives available, none can rival the quality of a homemade version.

Chef Jacquy Pfeiffer, part of the 1995 Club Coupe du Monde Team USA and the 1997 team alongside Chefs Thaddeus Dubois and Sébastien Cannon, earned a silver medal at the Coupe du Monde de la Pâtisserie in Lyon, France. Now, he is generously sharing his recipe for a delectable puff pastry.
“Making puff pastry requires patience, perseverance, and practice,” says Pfeiffer. “I highly recommend that you undertake this recipe in a cold or air-conditioned environment so that the butter does not become soft on you.”
A well-made puff pastry dough is time-consuming. This recipe will take you two days from start to finish.
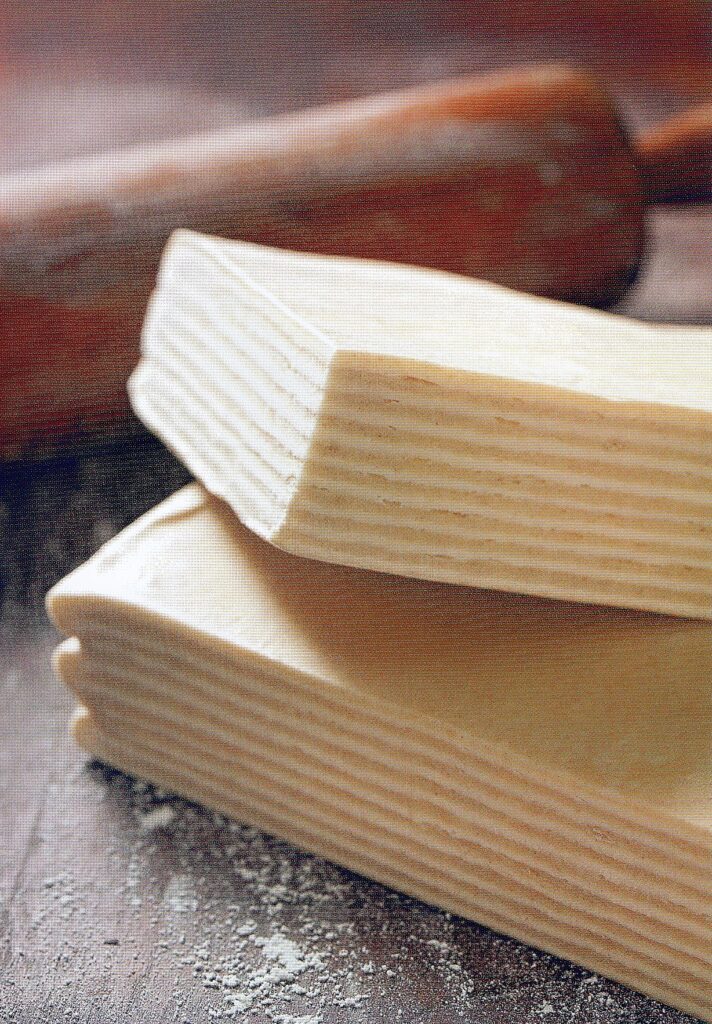
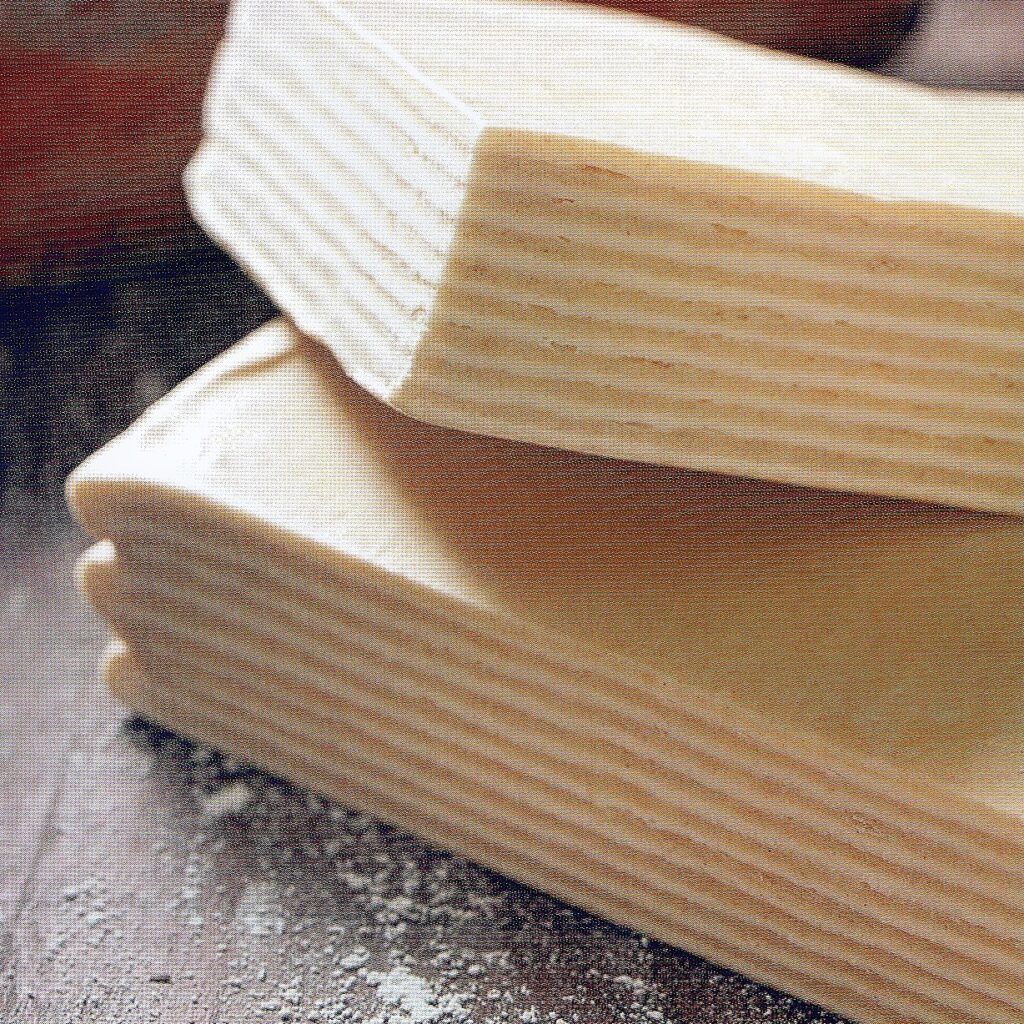
“Puff pastry dough consists of many alternating layers of butter and dough that are achieved by enclosing one large square of butter in one piece of dough, rolling this out, and then repeating a series of folds, turns, rests, followed by rolling it out again,” says Jacquy. “Each turn of the dough results in several layers of butter and dough, until eventually the dough forms a ‘book’ of more than 2,000 thinly and evenly rolled-out sheets. This process is called lamination. When done properly, the sheets all separate wen the dough is baked, making it the flakiest dough in pastry.”
In addition to the conditions and technique, Jacquy says that the choice of ingredients is also critical for the success of puff pastry-making.
The choice of flour is critical in making puff pastry. You want something with just the right amount of gluten so that it is either not too tough or too weak. Jacquy uses all-purpose flour. He says that a flour with too much gluten will “shrink uncontrollably.”
The white vinegar is also important for two reasons – 1) it relaxes the gluten and 2) it prolongs the shelf life of the dough due to its acidity. “Without the vinegar, the raw dough would turn grey after two days in the refrigerator,” says Jacquy.
Most chefs will typically use sea salt when a recipe calls for salt for a variety of reasons including that it does not taste as salty compared to other salts.
Next to flour, butter is another crucial ingredient in making puff pastry. Jacquy says that type of butter is critical. It is important to use butter with a minimum of 82% fat content. This is typically found in European or European-style butter.
“When you find inexpensive butter in the supermarket the low price is often [because] the butter is loaded with water,” says Jacquy. “This extra water will create excess steam during the baking process, which makes the dough rise tremendously, but more water in the butter also means fewer solids and your puff will eventually collapse.”

The following recipe can be found in Jacquy’s cookbook, “The Art of French Pastry,” a James Beard Foundation and IACP award-winning cookbook.
Puff Pastry – Ingredients
| Ingredients | Weight | Measurement |
| White vinegar | 3g | 3/4 tea |
| Cold water | 180g | 3/4 cup + 1 Tbsp OR 6 1/2 fluid ounces |
| Sea salt | 12g | 1 3/4 tea |
| All-purpose flour | 400g | 3 1/2 cups + 2 Tbsp |
| Butter (French-style, 82% fat) at room temperature | 60g | 2 oz |
| Butter (French-style, 82% fat) at room temperature | 340g | 12 oz |
| Confectioners’ sugar (optional) | As needed | As needed |
Puff Pastry – Instructions
Day 1
Making the Détrempe
“The dough base in puff pastry is called the détrempe,” says Jacquy. “I recommend that you make this by hand several times before you make it in a mixer so that you will understand what the dough should feel like. You will need a large work surface – at least 18 inches square and preferably larger.”
In a small bowl, mix the white vinegar, water, and sea salt with a whisk until the salt dissolves.
Spread the flour on the work surface in a wide, flat circle and create a 14- to 16-inch wide “well” in the center. The flour should look like a large lunar crater with a wide, flat well and walls that are about an inch high.
Make sure that the 60-gram piece of butter is soft – place it in a small bowl or ramekin and mix with a spatula. Microwave if necessary for five seconds at 50 percent power but do not allow the butter to melt. Place the soft butter in the middle of the flour crater and slowly pour in the water mixtures. It should remain contained within the walls of the crater. If your well is too small or you pour the water in too fast, it will break through the walls and flow out.
Use only one hand for mixing. Shape your right hand like a claw and place it in the center of the well with the fingertips touching the tabletop. Move your fingers around in the flour inside the well in increasingly wider circles, working from the center to incorporate flour into the butter/liquid mixture and always touching the tabletop with your fingertips. Use your other hand to bolster up the sides of the crater as you work from the center to the outside of the crater, mixing in more and more flour until all of the flour has been incorporated. Once all the flour is absorbed, continue to mix the dough gently with one hand without kneading it. If you knead the dough you will over-activate the gluten, resulting in a rubbery dough that will shrink out of control when baked. Just gently work the dough around on the tabletop with your fingers to homogenizer it. The dough should come together and feel and look rough, but it should not feel dry; if it does feel dry add 1 to 2 tablespoons of water to it and gently work it in.
Once the dough has come together, use your dry hand to scrape off any dough sticking to your mixing hand, and mix these scraps into the dough. Lightly flour your hands and cup them around the dough. Without kneading it, shape the dough into a ball. The completely mixed dough should look and feel homogenized but will still be rough and a bit ragged.
With a chef’s knife, cut a 3/4-inch deep cross on top of the ball. This will cut some of the gluten strands in half and therefore slow down the gluten’s action. Wrap the détrempe in plastic wrap and cool in a refrigerator for one hour. Clean up your work area – first use a flat scraper to remove all flour and dough left on the surface, then wash and dry the work surface.
While your dough is resting, shape your butter block. Using a marker, draw a 7 1/4 x 9-inch rectangle on a sheet of plastic wrap. Place the 340-gram block of butter on another sheet of plastic, set the marked sheet of plastic on top and using a rolling pin, gently roll the butter into a 7 1/4 x 9-inch rectangle, using the marking on the top sheet of plastic wrap as a guideline. Do not press down too hard and take care that the rectangle is the same thickness all over. Wrap the shaped butter block in plastic wrap and place it in the refrigerator for one hour.
Wrapping the Butter Block and Laminating the Dough
Before you begin, make sure that both the butter block and the dough are properly chilled. They should be at refrigerator temperature, about 40 degrees Fahrenheit. This is crucial, if they are not cold enough, return them to the refrigerator. Both the dough and the butter block should be cold and firm but still somewhat pliable. I recommend that you roll the dough on a full silpat instead of a table or a board so that if the dough gets too sticky, you’ll be able to transfer it to the refrigerator on the silpat and salvage it. Once you are more comfortable you will be able to work directly on a work surface dusted with flour. First make sure your work area is ready and that all your tools are close at hand, then take the dough out of the refrigerator.
Dust the silpat or work surface with flour and place the dough on top. Press the dough flat with the rolling pin, then roll it out to a rectangle that is 18 inches long by 7 1/2 inches wide. Roll gently and evenly in one direction only. Keep sliding the dough on the silpat to make sure that it doesn’t stick; if it sticks, stop rolling and dust the rolling surface with a small amount of flour. Roll the dough a little longer and wider that 18 x 7 1/2 inches to allow for shrinkage, because dough always shrinks due to the gluten in the flour.
Remove the butter block from the refrigerator and place it on your work surface, leaving it wrapped in plastic. Tap it gently on the top surface for 30 seconds with a rolling pin to make it more pliable while not changing its shape or size. If the butter is not pliable, it will not roll out. Instead, it will shatter.
Position the rolled out dough and the silpat horizontally on the counter (with the long side closest to you)/ Unwrap the butter and place it on the left half of the rectangle. It should cover half the dough with a very small margin on the sides. Fold the right half of the dough over the butter block and seal all seams so that the butter is completely enclosed in the dough. You should not be able to see any butter at all. Tap the dough gently for 30 seconds with a rolling pin, turn it, and tap again, continuing until the dough and the butter are bound together. Turn the silpat and dough vertically.
Now you are ready to roll out the dough and make the “first turn.” The absolute key to this procedure is to make sure that the dough and the butter are cold, yet still pliable and that you work quickly so that neither the dough nor the butter becomes too soft. If the butter becomes too soft it will ooze out from the dough, if it is too hard it will crack and break into small lumps during the rolling process (this is why you should never chill the butter in the freezer).
Dust your silpat or rolling area generously with flour, place the dough on it, and dust the surface of the dough as well. Slide the dough back and forth on the silpat a few times to make sure that it won’t stick. Start rolling out the dough gently and evenly. It is important not to apply too much pressure to one particular area of the dough, as this will result in uneven layers of dough and butter causing them to rise and bake unevenly. Roll in long continuous strokes over the entire dough and make sure to roll over the ends. Another crucial thing is to roll the dough for only 10 seconds at a time, then stop and check to make sure that the dough isn’t sticking to the silpat or table. If the dough does not slide, stop rolling at once and dust more flour underneath to ensure that it will (this principle is the same for all rolled doughs.) Also, if the rolling pin gets sticky, stop rolling and dust it and the top of the dough lightly with flour. If the butter feels soft during the rolling and oozes out of the dough, it has become too warm. Stop rolling immediately and place the dough-and-butter “book” in the refrigerator for 30 minutes. If the butter breaks apart and looks like a cracked desert floor, the butter is too cold or was not tapped enough to make it pliable. In the case, stop rolling at once and leave the book on the work surface for 5 minutes, flipping it over every 2 minutes so that it will warm up evenly, then continue rolling it out.
Roll the dough out to a 12-inch square, then to a rectangle about 1/4 inch thick, which should be 18 inches long by 7 1/2 to 8 inches wide. If you are working on a full-sized silpat it will help to position your silpat vertically in front of you so that the short end is nearest to you. turn the rectangle horizontally, so the long edge is closest to you.
Once you have obtained a 1/4-inch thick rectangle, turn the rectangle horizontally, so the long edge is closest to you, and brush off the surface with a dry pastry brush. Then fold the dough like a business letter – folded the right third of the rectangle over the center third and the left third over the center. Tis is the first of six (6) turns. Using your thumb or a finger, make slight indent on the dough’s surface to register the first book fold. Wrap tightly in plastic (you can also make the plastic to indicate each turn). and refrigerate for 30 minutes.
Flour your work surface or silpat and place the folded dough on top with the open ends facing you and the folded edges to your right and left. Roll the dough out to a rectangle about 1/4 inch thick. Turn it 90 degrees so that it is horizontal on your work surface (with what were the open ends to your right and left) and fold it again like a business letter. This is the second turn. With your finger, make two small indentations on the top of your dough to mark the second fold. Wrap airtight in plastic and place the dough in the refrigerator for 1 to 2 hours. This is needed to relax the activated gluten from rolling.
After the rest, repeat the book fold two more times, allowing the dough to rest in the refrigerator for 30 minutes between turns. Mark the dough and/or plastic each time. You should have four turns. Wrap the dough airtight in plastic wrap and let rest in the refrigerator overnight.
Day Two
The next day, make two more book folds and mark the dough. The dough is now ready to be used, but before that it needs to rest for one hour or as long as 48 hours in the refrigerator. It can also be frozen at this point in its raw stage. To freeze, cut into 3 or 4 equal pieces and roll out to 1/4 to 1/2 inch thick. Place the pieces on a sheet of parchment paper and place on a sheet pan. Lay a sheet of plastic over the top of the rolled out dough, chill in the freezer until stiff, then wrap airtight in plastic. To defrost, let the sheet of dough come to room temperature on a sheet pan for 30 minutes.
Rolling out the Puff Pastry
Cut the pastry into four equal pieces. Line a sheet pan with parchment paper. Roll out each piece of pastry to a 1/4 inch think square or rectangle, depending on the recipe you are using the puff pastry for, and place on the parchment paper. Make sure yo roll the sheets out evenly. Cover with plastic and refrigerate while you roll out the next piece. Place the next rolled out piece on a sheet of parchment paper and set on top of the first rolled out sheet on the sheet pan. Cover with plastic. Repeat with the remaining dough. Let the dough rest for one hour or longer in the refrigerator before baking.
Baking Instructions
Remove the plastic from between the layers of dough. Unless you have a convection oven, I recommend that you back one sheet at a time int he middle of the oven.
Preheat the oven to 400 degrees Fahrenheit/200 degrees Celsius (or 350 degrees Fahrenheit/190 degrees Celsius for a convection oven). The first 15 minutes of baking must be at a high heat in order to force the layers to separate and make the puff rise. A cooler oven would create too little steam and a flat puff, which is unfortunately irreparable. Before baking the sheet of puff pastry, place each one on a sheet pan lined with parchment paper and poke all over with a fork., allowing 3/4 inch of spacing between each poke. The holes will allow the steam to escape from the dough so that it rises evenly. You can also use a dough docker to accomplish this as well.
To further ensure that the puff rises evenly and that the top remains flat, place a wire rack over the sheet of pastry, legs down but not touching the dough. You will remove the rack after the first 30 minutes of baking. Place the pastry in the oven and set the timer for 15 minutes. The puff should have risen. Now turn the oven down to 325 degrees Fahrenheit/160 degrees Celsius and set the timer for 15 minutes. Remove the rack from the top of the puff and continue to bake at the lower temperature for another 30 to 40 minutes, until golden brown all the way through. This amount of time – 1 hour total or a little longer – is necessary to ensure that all of the water present in the dough has evaporate, which is what makes the puff pastry flaky. If you leave the tough too long, however, it will burn, so watch it carefully.
If you want your baked puff pastry to be caramelized, flip the fully baked puff pastry over so that the top is perfectly flat and sprinkle it with confectioners’ sugar. Place it under a preheated broiler, about 3 inches away from the heat, for 1 – 3 minutes, until the sugar is transformed into a golden caramel. Watch very closely so that you don’t burn the pastry. This contributes great flavor and texture to the puff.
A properly baked puff pastry will be golden brown all the way through, including in the center. If it is white in the center, the dough will be tough and gooey. Underbaked puff pastry is a sacrilege! So is overbaked puff for that matter!